- LJ and Whistler are exchanged, but more surprises abound. Meanwhile, T-Bag's scheming finally pays off.
- Michael and Lincoln chase Whistler (who calls Gretchen) in the warehouse. However the brothers capture him and Michael schedules the exchange meeting in the public space Plaza de Francia. Gretchen invites him to join The Company, and he changes the spot to the lobby of the Museum of Antiques. Meanwhile, McGrady's truck is stopped for inspection in a police barrier and the policemen sees that the cargo is fertilizer; however, McGrady is hidden in a hideout in the cabin. Then his father drives to Acandi, Colombia, where he is welcomed by his family and friends with a party. T-Bag apparently protects Lechero and lures him telling that they may buy their freedom for US$ 50,000.00. When Lechero calls his prostitute to bring the money, he finds that this is actually T-Bag's plan to escape and the traitor kills him. Sucre is beaten and forced to dig his grave; he does not give any information about Michael, is buried alive and then brought to Sona, where he sees T-Bag. When Gretchen arrives at the museum, she finds that there is metal detector on the entrance. She leaves the armed agents at the exits to kill Michael and Lincoln. They trade LJ per Whistler, and Sofia asks Whistler for the coordinates; they discover that there is no coordinates. Sofia leaves Whistler while Michael breaks a window and the security alarm sounds, and they walk together to the exit. There is a shootout, Sofia is wounded and LJ stays with her. Michael has the chance to kill Gretchen, but he hesitates and she escapes. T-Bag gets part of Lechero's money, makes a speech to the inmates telling that they are all equal and distributes the money. LJ gives Sara's origami to Michael and tells him that Sofia has something that belongs to Whistler in her apartment; he goes there with Lincoln, finds a file of Jason Lief and he splits and say goodbye to Lincoln telling that he must chase Gretchen. Meanwhile, Whistler meets Mahone in a bar and together with Gretchen, they leave the place as a team.—Claudio Carvalho, Rio de Janeiro, Brazil
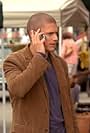
- The brothers chase Whistler by car, then on foot, and catch him just after he called Susan. Michael changes the exchange site to the very public Plaza de Francia, no- after seeing LJ, he says that was a test, final instructions will follow: the museum of antiquities, with metal detectors; when Sofia learns there are no coordinates, she deserts Whistler; Michael avoids Susan's exit guards by triggering the burglary alarm, her men still open fire and hit Sofia. Sucre doesn't talk despite bad beatings and digging 'his own grave'. T-bag saves Lechero from other scum while Sona is in total chaos, then demands $50,000 to bribe the new commanding colonel, a scam before smothering him and distributing the money among the cheering prisoners in the name of equality. McGrady is lucky not to be found by a police road-block in his dad's car, the family holds a fiesta. Malone ran alone, and meets up with- Whistler and Susan. Michael follows Sofia's message via LJ to get files on Jason Fields in her apartment....—KGF Vissers
- The season finale has Lincoln Burrows and the just-escaped Michael Scofield chasing after James Whistler, who they helped escape from prison and who they need to trade for Lincoln's son LJ and Sofia Lugo, who was kidnapped by Susan. They catch up to him just as he tries to contact Susan on a borrowed cell phone. Scofield contacts Susan, setting up a meet at the Plaza de France. Susan meets Scofield, but the Whistler/LJ exchange doesn't go down; Scofield, seeing LJ and Sofia, meant it as a confirmation that everybody's alive. "When the exchange is over," says Scofield, "you and I are going to spend some 'quality time.'" Susan's reply: "When the exchange is over, you better run for your life." Susan is playing dirty, bringing her henchmen to kill Burrows and Scofield. Scofield sets up a second meeting at the lobby of the Museum of Antiquities. LJ is delivered to his father, while Sofia, upon being reunited with Whistler, demands to see the coordinates Whistler said he was going to hand over to Susan. "There are no coordinates!" cries Susan. Sofia leaves Whistler. Scofield, correctly suspecting that Susan brought backup, sets off the museum's burglar alarm. "We're all going out of here together," he announces. They are searched by the museum guards, who suspect Whistler of wrongdoing and ask him for identification. Susan calls in her henchmen for backup. One points his gun at the crowd, but before he can fire he is felled by one of the museum guards. His gun goes off, accidentally hitting Sofia. Susan runs off with Whistler, who's a little angry about his girlfriend getting shot. Scofield also has girlfriend issues with Susan--he hasn't forgotten that she killed Dr. Sara Tancredi. He tries to shoot her, but she hustles off into a getaway van with Whistler while the museum guards open fire. Burrows, who's smitten with Sofia, tries to take care of her wounded body, but LJ talks him into running off. Whistler tells Susan the book of birds is gone, left back in the prison and now the property of T-Bag.
Luis Gallego, another escapee, is driven to the Columbian border by his father, but they hit a police roadblock. His father's truck has a hidden compartment big enough for his son. He drives away undetected. He is delivered to his home and family.
Back in Sona Prison Theodore T-Bag Bagwell, facing torture by prison guards who very much want Scofield back, is freed from his captors when he sees Fernando Sucre and rats him out as one of Scofield's friends who might have helped with his escape from Sona. Sucre is now the object of torture. The guards hand him a shovel and have him dig his own grave. He is then ordered to lie down in it while the guards cover him with dirt. "Where is Michael Scofield?" the guards ask to no avail. When he's covered up to his neck, the head of the guards gives up on the interrogation and he orders him to be removed from the grave and sent to prison. He then intercepts a cell phone call from Scofield, who he won't rat out to the guards. "Kill me if you want," he says to the guard holding a gun to his neck. "You're gonna wish we had," replies the guard, who escorts him back to his cell. "Welcome home."
T-Bag rescues Lechero (wounded by prison guards when he tried to escape with T-Bag and Brad Bellick, who were also unsuccessful) from rioting prisoners. T-Bag tells Lechero that one of the guards offered him a chance to buy their freedom--$50,000 is the price, which can brought to the prison by Carmelita, the prostitute who dresses like the nun Sister Mary Francis and who has serviced Lechero in the past. When T-Bag gets a phone call confirming delivery of the money, he murders Lechero by smothering him with a pillow while the cowardly Bellick looks on. T-Bag tells Carmelita that Lechero is dead. She gives him some of the money and he trusts her to hold on to the rest. He announces Lechero's death to his fellow prisoners. "All cons are equal," he declares. He holds up the money "made off of your backs. It's yours--and I'm giving it back." He throws the money to the crowd.
Escapee Alexander Mahone, discarded by his fellow escapees, finds himself at a bar. He meets Whistler. "Are you in or are you out?" Whistler asks. "I'm in," he says, after pointing out that Susan is the weak link--Scofield is going to come after her for killing Dr. Tancredi. Susan, Whistler and Mahone drive off together.
LJ visits Sofia in the hospital and imparts the good news that she'll be OK to Burrows and Scofield. He hands an origami rose to Scofield, given to him by Dr. Tancredi, who received it from Scofield. "I think she would want you to have it," he says. "She told me to tell you that there's something in Sofia's apartment--something underneath her bed. Its something about Whistler." Burrows and Scofield find a suitcase under Sofia's bed with a surveillance report about a man named Jason Lief, who will probably be introduced to us next season. Scofield plans to use the information to hunt down Whistler so he can get to Susan.
Contribute to this page
Suggest an edit or add missing content